

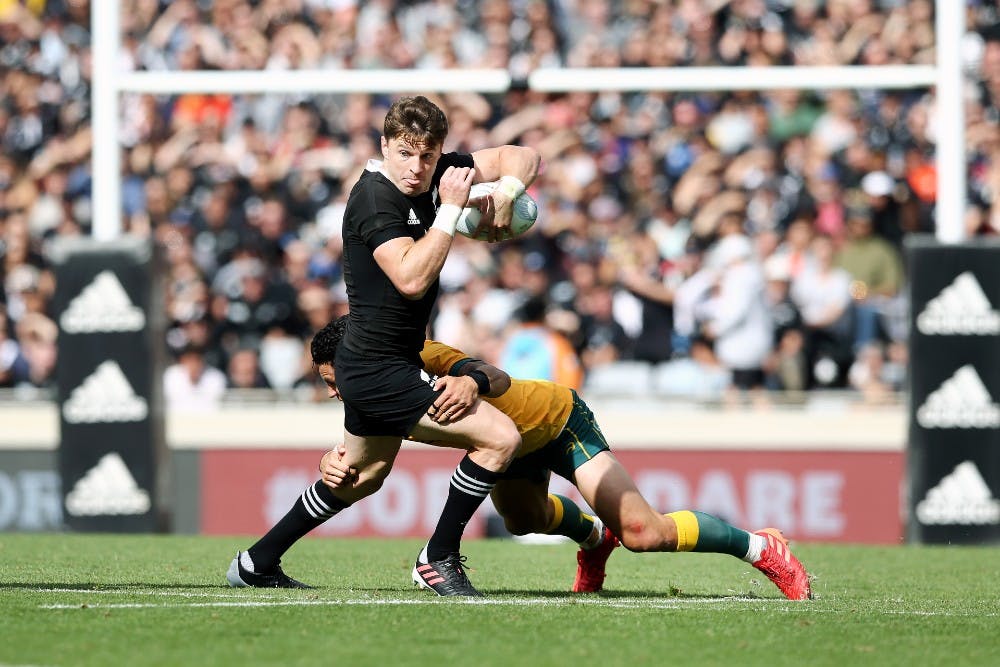
Ahead of Bledisloe II, Wallabies coach Dave Rennie said his side had to be extra accurate with their kicking so to not allow Beauden Barrett space to burn the Wallabies.
"He’s certainly one of the best around, isn’t he?" Rennie said, after Barrett's return from injury. "He obviously played a lot of 15 for the Blues and he’s played (there) a lot for the All Blacks in recent times. What we’ve got to make sure is if we kick that we’re able to shut him down (because) his speed and his ability to counter and ability to create opportunities for others through running or kicking is a real strength."
The Wallabies failed to heed that warning at Eden Park on Sunday, and not just with Barrett but winger Caleb Clarke too.
We all know the Wallabies’ defence is what ultimately killed their chances of ending their 34-year losing streak against the All Blacks at Eden Park.
In all four of the All Blacks’ tries the Wallabies were found wanting in defence; James O’Connor was bumped out of the way by Jack Goodhue ahead of Aaron Smith’s snipe; Harry Wilson missed Dane Coles in the lead up to Jordie Barrett’s try while Filipo Daugunu also bit off his wing; five defenders failed to bring down Caleb Clarke following O’Connor’s kick, which had the visitors scrambling before Ardie Savea scored; and Marika Koroibete played the wrong line in defence and missed Patrick Tuipulotu, who passed to Same Cane for their four try.
Two of those four tries came directly from the counter.

In total, the Wallabies missed 42 tackles in defence while the All Blacks had 38 tackle busts.
It led to Rennie’s straight assessment that the Wallabies’ “tackled percentage” is what was the difference between Bledisloe I and II.
But there were three other key areas that the Wallabies let themselves down; their ability to take their chances, of which they had five strong attacking raids; poor kicking; and their failure to stop the All Blacks’ counter.
And yet the Wallabies did have multiple chances to hurt the All Blacks, which should give Rennie and his team confidence of what can be achieved in the final two Tests of the series against the All Blacks on Australian soil.
The Wallabies had three genuine try-scoring chances that they should have scored from while also mucking up another three strong attacking raids and a lineout in the All Blacks’ 22 metre zone too.
The first missed opportunity occurred in just the seventh minute when the Wallabies were hot attack and neither side was on the scoreboard.
After Nic White’s excellent cut out pass to Taniela Tupou, the tight-head prop bursts through is pulled down just two metres short of the line by Ardie Savea. Lukhan Salakaia-Loto, however, attempts a pick and go to his right and needed to either drive to the left or allow White to pass to his left. But Salakaia-Loto attempts to crash over to his right and should have earned the Wallabies a penalty as Savea fails to get back onside before helping tackle the lock, yet instead is rewarded with a penalty himself as he gets on the ball despite Australian referee Angus Gardner being right on the spot to see the offside.

From that moment on, the momentum turned in the All Blacks’ favour.
They were helped by two dreadful kicks by the Wallabies. On both occasions, the All Blacks got well over the gain line.

In the 14th minute O’Connor wastefully kicked away possession and allowed Caleb Clarke to get a full head of steam and get over halfway. The All Blacks then get through 11 phases and get inside the Wallabies’ 22, before they cough it up. Matt To’omua then clears off his left foot up to their 10m line first phase.
Moments later, in the 16th minute, the Wallabies manage to get possession back as the New Zealanders spill it just short of the Wallabies’ 22m line and once again the visitors wastefully kick the ball away first phase as prop Taniela Tupou clears.

With a staggered line in defence, Beauden Barrett burns the Wallabies, breaking five tackles before being tackled 35m out from the line. Moments later the Wallabies give away a penalty and the All Blacks collect the first points of the afternoon via the boot of Richie Mo’unga.
Twelve phases later, off the back of some good front foot ball from Barrett’s kick, the Wallabies score.
The Wallabies’ next best attacking raid comes directly off a kick too in the 36th minute. It’s important to note, however, that it’s the only contestable kick that the Wallabies put up in Bledisloe II and it forces an error.
White’s box kick is a beauty from the back of a rolling maul and forces an error from Caleb Clarke.

Immediately, the Wallabies shift the ball to the open side and find some space out wide before a great shot in defence from Anton Lienert-Brown.
The Wallabies, however, through some beautiful running lines find some space on the right as Hunter Paisami slices through. The Wallabies then shift it to the middle and with quick ruck retention then make further inroads out to the left before Marika Koroibete spills Ned Hanigan’s switch play.
After half-time, the Wallabies let themselves down again.
Having already coughed up the early try, O’Connor attempts an up-and-under but because the Wallabies are deep they can’t put any pressure on Clarke, who has already spilt one, and with a poor kick chase the powerful young winger punishes the Wallabies.

On each of the Wallabies’ three poor kicks (O’Connor twice, Tupou once) on Sunday they were punished.
The Wallabies only kicked the ball 11 times on Sunday. The one contestable kick from White, who found touch well with two other box kicks, he forced an error.
A week earlier, they kicked 19 times and White, in particular, put the All Blacks under a lot of pressure with his box kicks forcing Damian McKenzie to spill the ball four times, while George Bridge dropped one.
While the Wallabies had fallen behind 20-7 after 47 minutes, they still had chances to come back into the match.
Some excellent footwork from Hanigan in the 49th minute near halfway allowed Matt Philip to get over the gain line and the Wallabies managed to go deep into the All Blacks’ territory as they spread the ball to the right to Daugunu.
Moments later Koroibete, who should have stepped back on the inside instead of attempting to barge over Mo’unga, is held up over the line on the left touchline. It should be mentioned, too, that
Hanigan’s decoy line was beauty to attract a defender and allow the space for Koroibete to run into was a beauty too.
Having had the advantage, the Wallabies kick for touch and then Brandon Paenga-Amosa, who had been excellent until that point in time, is penalised for a double movement in the process of reaching out to score.
Two bombed try scoring opportunities.
Rubbing salt into the wound, Sam Cane then makes Petaia pay for a careless error and scores minutes later to ice the game.
Even still, the Wallabies had another tryscoring opportunity in the 56th minute following Koroibete’s linebreak. But the Wallabies were slow to support and having been brought down 10 metres short of the tryline, Liam Wright has the ball ripped away by TJ Perenara.
The Wallabies had their chances in Bledisloe II.
They had six attacking raids to the All Blacks’ three, but their failure to score early in the first half and twice in the second half killed their chances.
Their kicking game was punished too. Where they were excellent with the boot in Wellington (19 kicks), on the dry track in Auckland they almost neglected the kick, particularly in the second half, and when they kicked they were made to pay three times out of 11.
While two of the three kicks led directly to points, each of them sapped their energy as the All Blacks pounded and got well over the Wallabies’ gain line. They also played into their hands of speeding the game up - something that is a strength of New Zealand rugby and was demonstrated in Super Rugby Aotearoa – and when Beauden Barrett and Aaron Smith are in your side, there are no two players who thrive on quicker ball than the All Blacks duo.
As Michael Hooper said in regards to the physicality of the All Blacks: “I think what they did well was they made us pay on our turnovers. When you’re retreating, we’re missing tackles, our line’s going back and they’re coming forward onto you, it’s hard, it’s hard to make a big stop, hard to get guys into the breakdown to turn the ball over. Last week, if you compare that, we were able to get a nice defensive line, get up and make dominant defensive tackles, so that was a different there.”
The Wallabies aren't out of the Bledisloe Cup series yet, but they mustn't play into the All Blacks' hands by trying to beat them at their own game and giving them space to counter.


